


Championing chicken pot pie
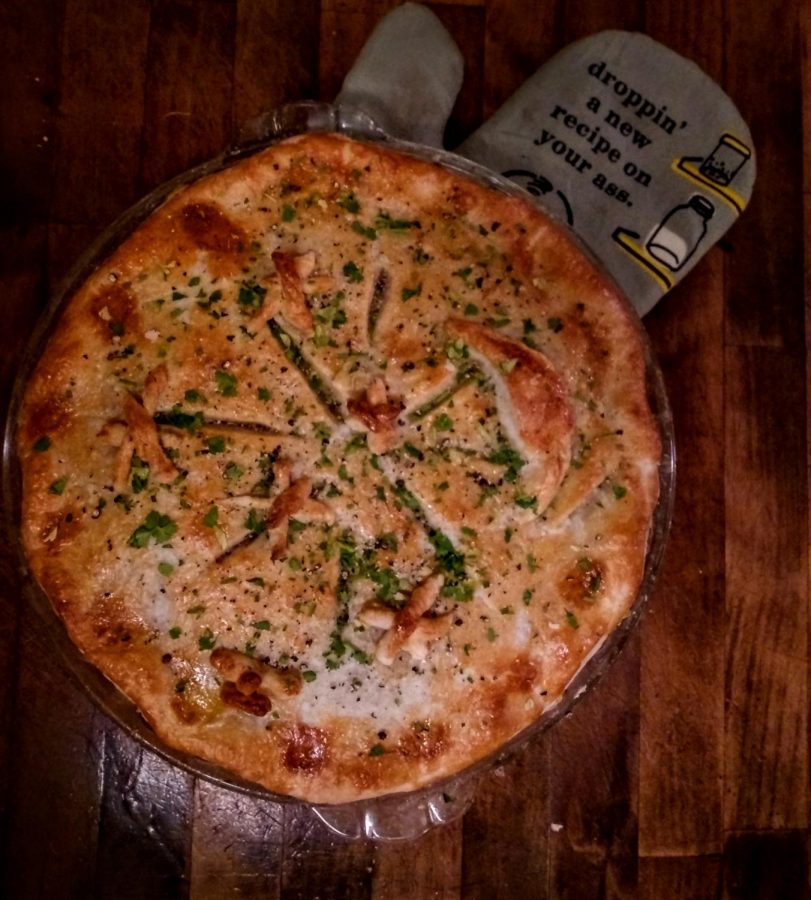
6. Chicken pot pie success! Note the position of the cuts made into the top crust in the shape of an asterisk (*).
Chicken pot pie is best when the weather is at its worst. That’s not to say it’s not great when it’s gorgeous out — as evidenced by me writing this, outside on a late February afternoon in a hammock wearing shorts and a T-shirt.
Pot pies date back to the ancient Turks. The Romans took the idea back to Italy, then to their northern campaign routes in the British Isles. About any meat can be — and has been — used, including duck, pork, venison, beef, lamb and even fish. We’re going to keep it traditional today though, because getting the basics down allows for future experimentation. Chicken it is.
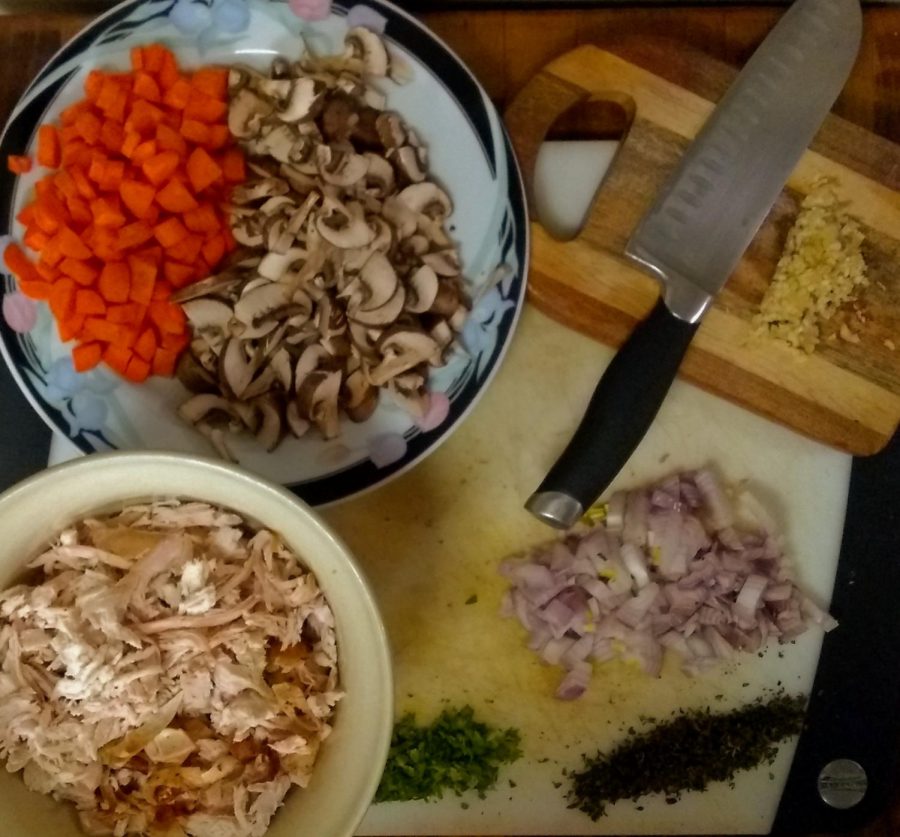
1. The prep picture, just to illustrate the necessary uniformity of the cuts. Feb. 24, 2021 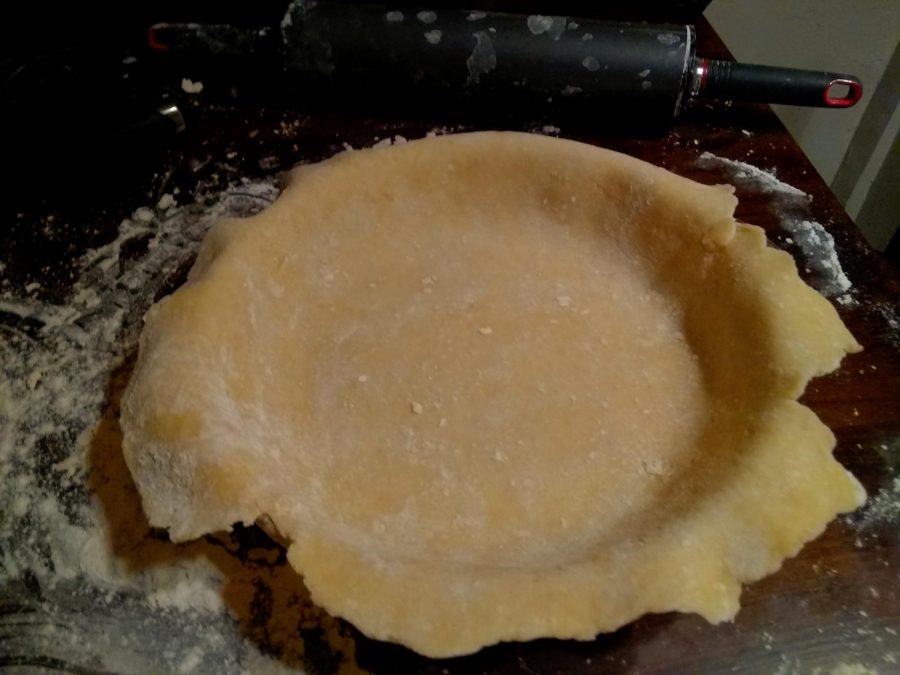
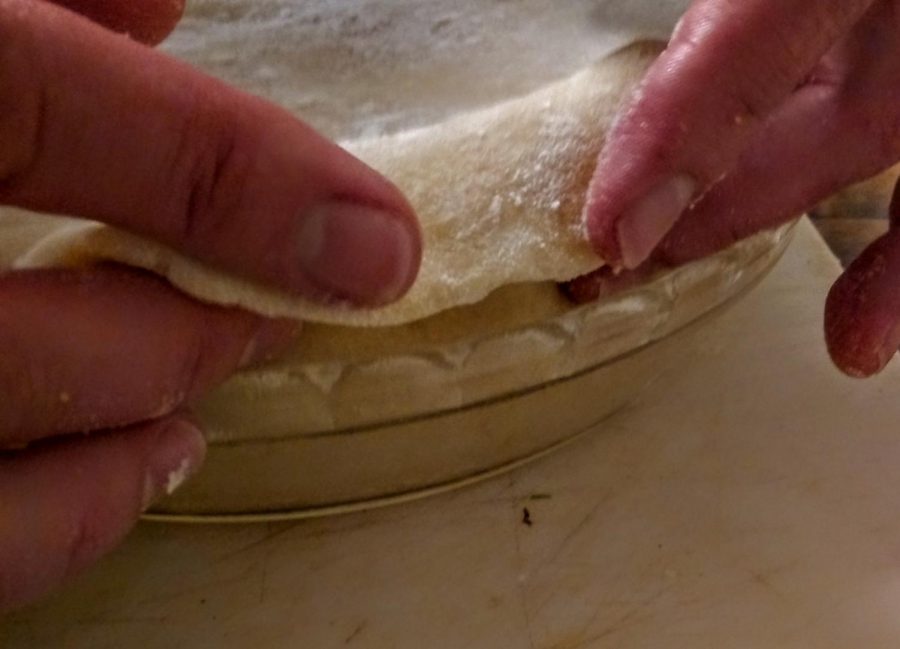
2. The crust is overlapping the pan rim considerably. I probably could have done a better job on that one corner particularly, but don’t be shy about that overlap. See picture 3 for technique illustration 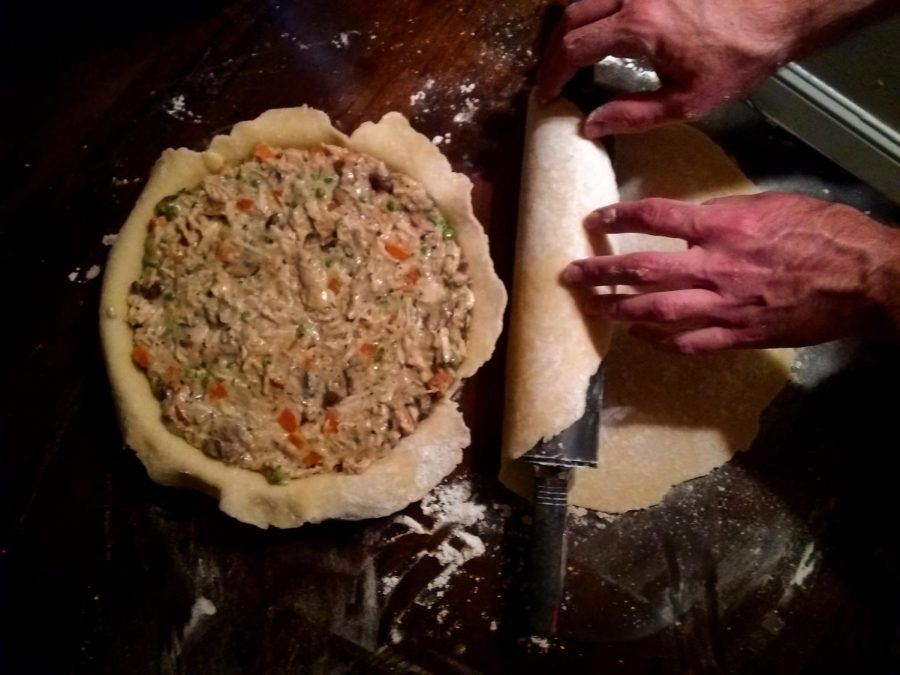
3. Dust the rolling pin with flour and wrap the crust thusly, allowing for ease of transfer. Do this for both bottom and, after spreading in the filling, top crusts. 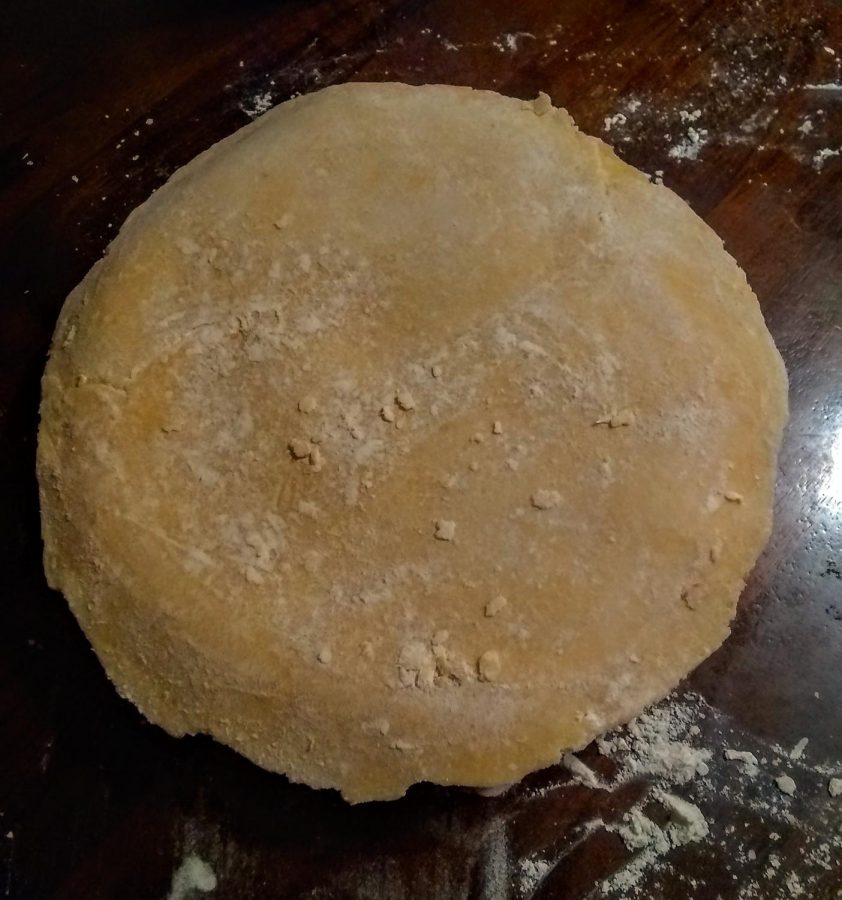
4. Lay the top crust as evenly as possible. There should be overhang here, like the bottom crust in picture 2. 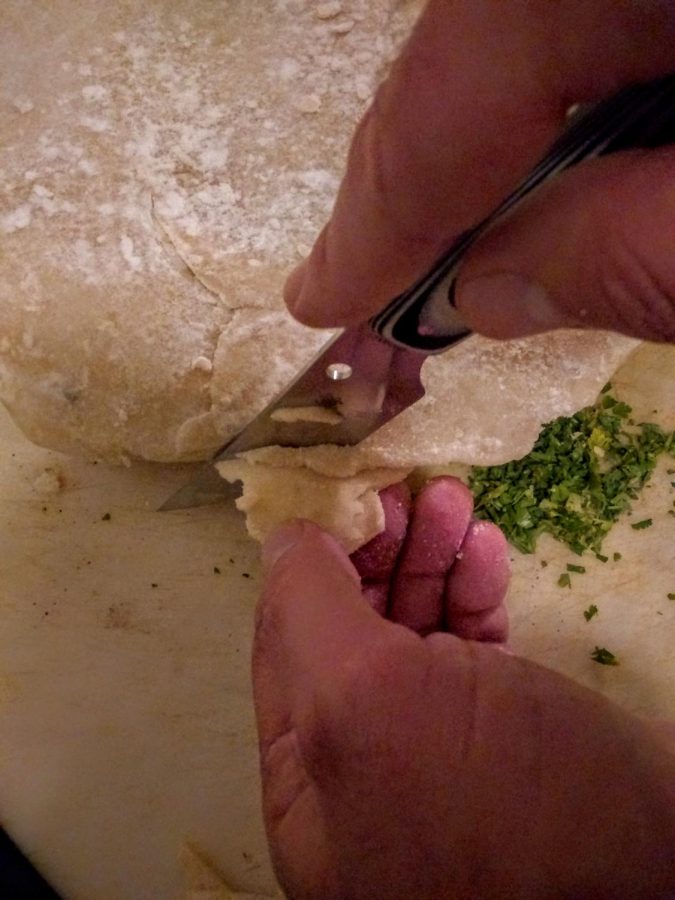
5. Trim the edges after the top crust is laid out, leaving an inch or so of overhang. 6. Chicken pot pie success! Note the position of the cuts made into the top crust in the shape of an asterisk (*).
Some people swear by a pot pie filling and top crust only. Others prefer a bottom and top crust. I’m a fan of the latter, so that’s what’s happening below. Store-bought crusts aren’t recommended. If you’ve read my Butter Pie Crust recipe, you’ll know why I feel this way. Making your own pie crust in advance is step one.
Regarding chicken, it really comes down to how motivated you are. I roasted a whole chicken, but picking up a rotisserie chicken from your grocery store works just fine.
Pick your pie pan wisely. This recipe fills one 10-inch pan, so adjust the volume according to your preference. Moreover, I cannot stress enough the benefit of using a heat-treated glass (Pyrex) pan. Glass directs heat more evenly than metal. Do not use tin.
Like all things in baking, consistency is the key. Specifically, consistency in the size of your chopped vegetables. Obviously, a quarter-sized slice of carrot will take longer to cook than a dime-sized one at the same temperature. Furthermore, remember that mushrooms shrink when cooked — cut them into larger slices than the carrots and onion (see picture 1).
The procedure is simply cooking veggies, making a sauce with them, putting that filling into a pan and baking it. The “magic” to be found in this dish lies in varying preferences of flavor or texture and tips regarding correct baking and shielding technique. This is a great recipe for a family, a dinner party or just for revisiting later in the week at midnight. Whatever your plans, you won’t leave hungry. Apologies, but there are notes below.
Let’s cook.
Equipment
Rubber spatula
Kitchen knife
Cutting board
Large cooking pot
Measuring cups and spoons
Rolling pin (for placing the crust)
Brush
Tinfoil (for pie shield; see note 7 and pictures 9-13)
Ingredients
6 tablespoons unsalted butter
2 medium carrots, chopped
1 medium yellow onion, chopped
1 ½ – 2 cups mushrooms, sliced
3-5 garlic cloves, diced (I’m a garlic enthusiast and usually use 6. Up to you.)
1/2 cup flour
2 cups broth (preferably chicken, but vegetable works as well. See note 1.)
1/2 cup heavy whipping cream
2-3 teaspoons salt
2 teaspoons black pepper
4 cups cooked, shredded chicken
1 cup frozen peas
4 tablespoons chopped fresh parsley. Separate, setting aside one of those tablespoons for garnish (see note 2)
3 tablespoons chopped fresh thyme (stems and all, as long as they’re not too “woody”)
1 egg, whisked (see note 3)
Procedure
Preheat the oven to 425 F.
Heat a large cooking pot on medium-high and melt the butter.
Add both carrots and onion to the pot. Stir and cook for 6-8 minutes until fragrant and onion is translucent (see note 4).
Add mushrooms to the pot. Stir well, then add the garlic and stir occasionally for another 5 minutes, or until the mushrooms soften and shrink.
Add the flour and stir constantly for a couple of minutes. Thinly clumped on the veggies, the flour should look golden.
Add the broth and heavy whipping cream, stir well and bring to a simmer, then cook for about a minute, stirring occasionally.
When the consistency reaches gravy-level thickness, add the salt and pepper and stir.
Add the chicken, peas, thyme and 3 tablespoons of parsley, then stir well. Rest assured, this is the end of the stirring.
Take the pot off the heat (don’t just turn the heat source off — move the pot to a cool surface).
While the filling is cooling, prepare your pie pan, spread the filling, add the top crust and cut and crimp (see both note 5 and the pictures listed within it).
Cut vents into pie top crust (see note 6 and picture 6).
Brush egg wash over the pie crust. Really get into all folds and cuts (again, see note 3).
Top the pie with a sprinkling of salt, pepper, and the remaining tablespoon of parsley.
Bake for 30-35 minutes. Oven temperatures vary, adjust your time accordingly (see note 7).
Like every cooked dish, let it set for at least 10 minutes, preferably closer to 15. You’ve come this far. Don’t be impatient. The filling will fall apart if you cut into it too soon. It’s telling you that you can do this. Listen to the pie.
7. Use your fingertips to tuck the top crust in between the bottom crust and the pan wall. Don’t forget to gently pinch as you go. 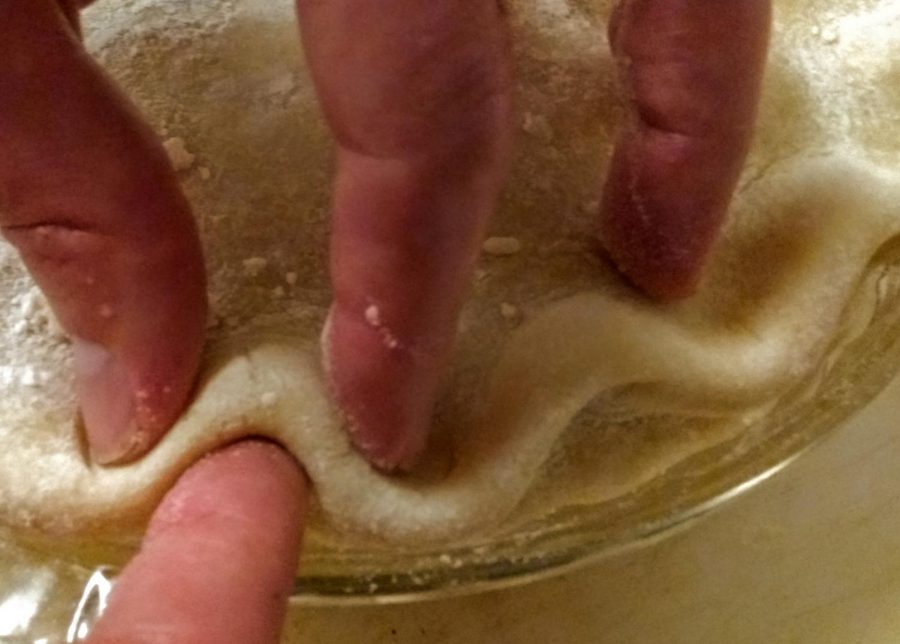
8. I prefer wider waves of crimp. Use both hands for this effect. 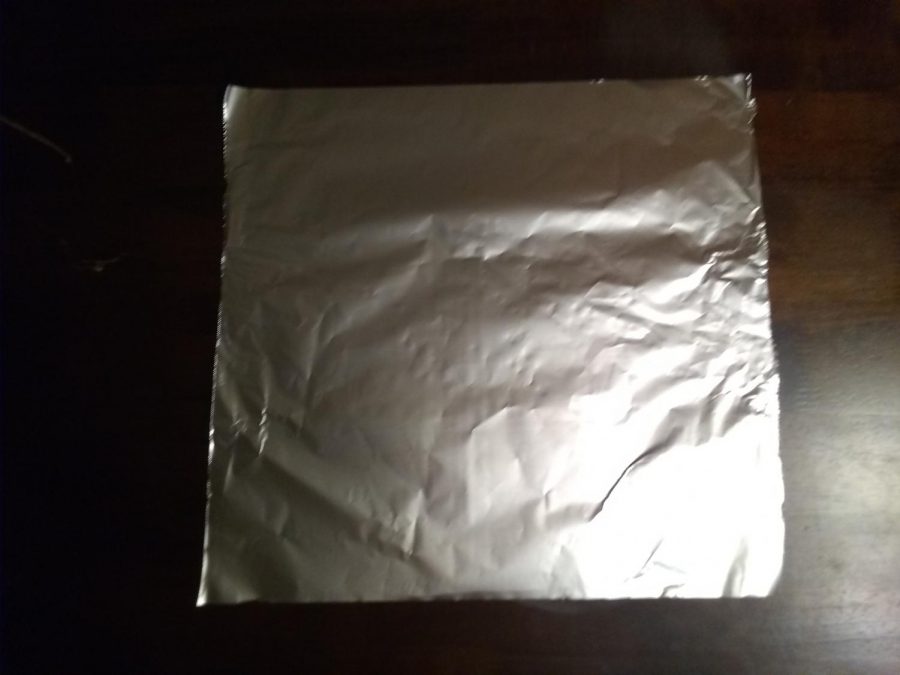
9. Tear a sheet of tinfoil that can cover the pie entirely. 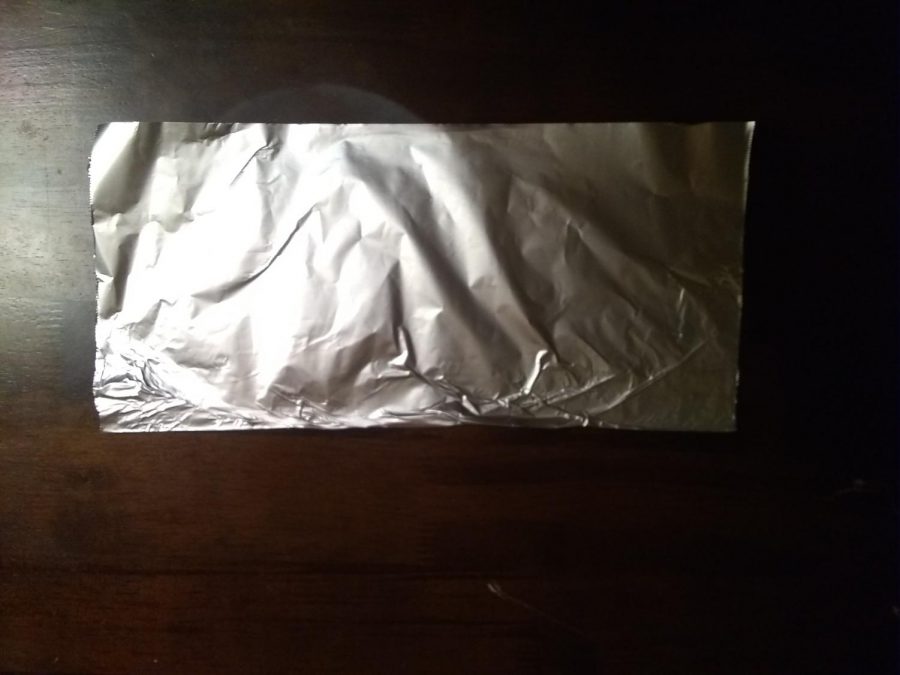
10. Fold the sheet in half. 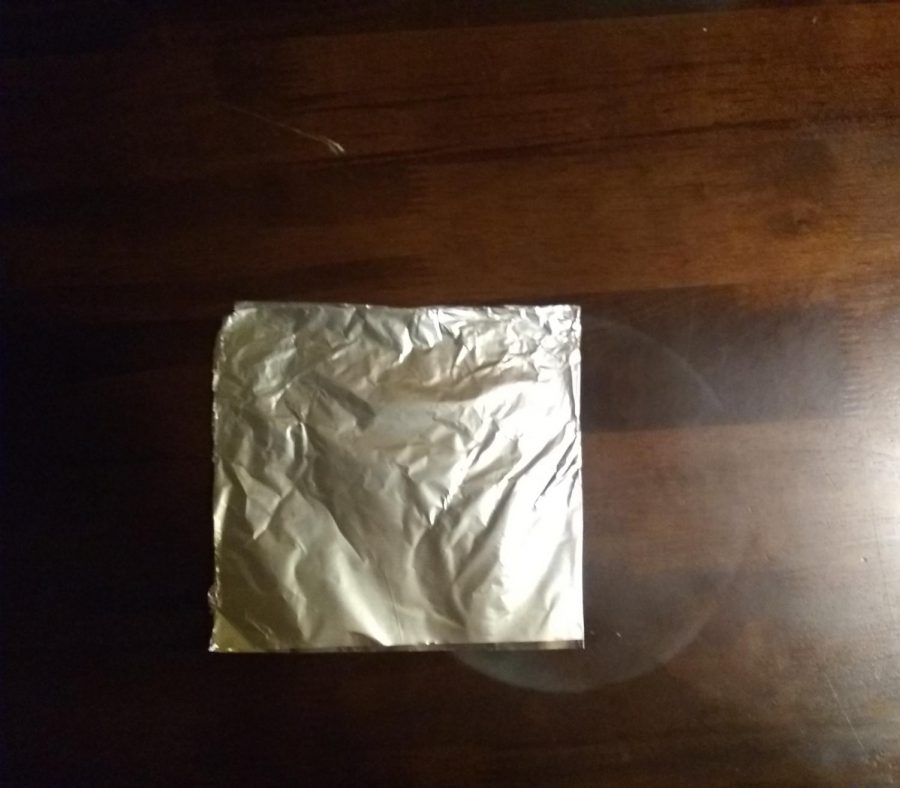
11. Fold the sheet in half again. 
12. Cut, in a circular shape, the corner where all folds meet. 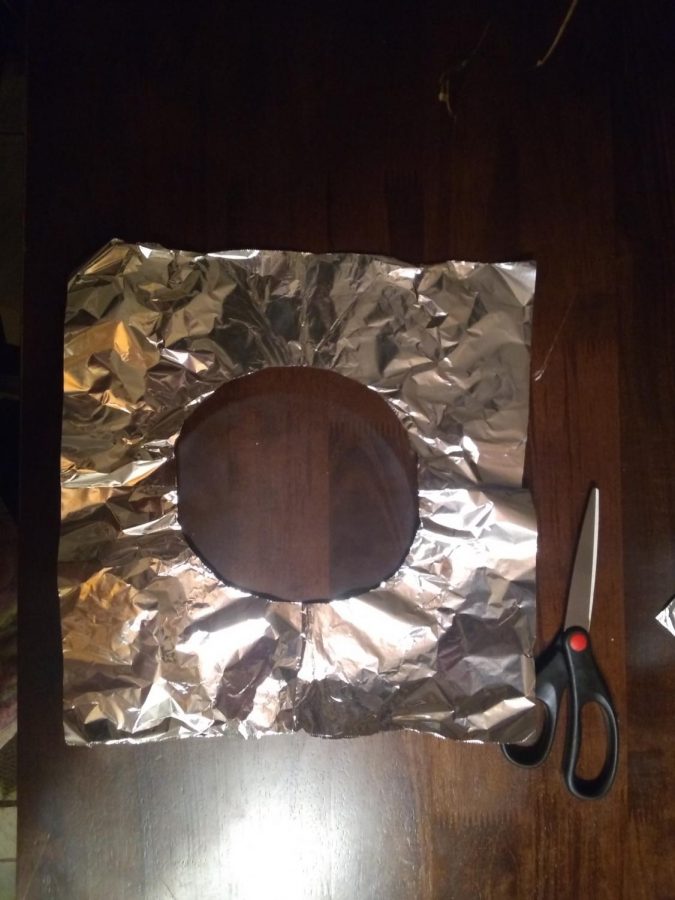
13. This is what your pie shield should look like.
Notes
1 Here’s a way to branch out: I made duck stock earlier this month and used that in lieu of broth. It was worth it. Look into making stock! Buying a whole chicken or duck becomes a fountain of culinary resources and creativity while also saving money. Also, for my pie I used shallot in lieu of yellow onion, another example of a tasty tweak.
2 As this is a hardy dish; one should not use dried herbs. They have to be fresh. Sure, different schools of thought and all, but dried herbs in a chicken pot pie must not be, regardless of how the cook experiments. I listed parsley and thyme as a base, but I implore you to play around with piney rosemary, earthy oregano, even sweet or spicy basil to assess your particular recipe.
3 When your task is spreading an egg mixture to coat something, don’t just whisk an egg. Whisk it, but add a quick splash of water and then continue whisking it. The amount of water should come out to about a teaspoon, depending on the size of the egg. Because the egg is a protein and a binder, it takes water to “loosen” it up for spreading so it doesn’t pool on your pie crust. When adding the water (again, just a quick splash) to the egg and whisking, do so when you need to brush the pie crust, and not before. Allowing the water to sit in the egg will break down its protein over time.
4 As stated above in the intro, stirring is foundational for this recipe. Pay attention to the steps that say to “stir occasionally” or “stir constantly.” The verbiage is correct; this is one area where the cook can’t cut corners.
5 Ok, the big one: crust. I posted an article titled Butter Pie Crust, and there are loads of other recipes online, but the bottom line, I’m afraid, is that store-bought pre-formed pie crust shells can’t cut it here. Good news though! Making your own is resplendently easy. Next.
· As you have undoubtedly made your own pie crust because you’re a kickin’ cook, it’s time to roll it out onto a floured surface. Measure it accordingly and wrap it around your rolling pin for transfer into the pie pan (see picture 3 for technique). After ensuring that the crust overlaps evenly across the pan, tuck the crust into the corners of the pan with your fingertips, making sure that each area of the pan side wall has an equal amount of crust standing above the rim (see picture 2). Make sure the crust at the bottom of the pan is flattened out.
· After laying your bottom crust — again, some people don’t like a bottom crust for a reason I have to assume is valid — and scooping in the filling evenly, use the same rolling pin technique to lay the upper crust layer on the filling (see picture 4). Cut off the excess (see picture 5).
· The upper layer of crust should overreach the pie pan lip so that it can be tucked underneath the walls of the lower crust layer along the pan walls. As you tuck and turn the pan, pinch lightly to seal the fold (see picture 7).
6 Vents are a necessity. Going traditional: cut six slits radiating from the center halfway and equidistant between the center and the edge (ridiculous description I admit, but look at picture 6 for reference). Just make sure the filling can breathe while it bakes. I prefer to add some outward aesthetic by pinching the edges (see picture 8).
7 I know I said 30-35 minutes, but here’s the real scoop: although the baking process should take that long, set a timer for 20 minutes. When you check on your pie, the edges should be pleasingly golden brown. It’s got another 10-15 minutes left and we can’t have the top getting overdone. Enter: the pie shield (see pictures 9-13). Loosely place the aluminum foil sheet with the hole cut out over the pie and continue baking for the remaining time. This protects the eggy butter crust! Our buddy, remember?
Final note: Thanks for making it this far, from cook to cook. Even if you disagree with 85% of what I’ve professed, that’s still 15% that you’ve taken with you. Look, this is chicken pot pie, not duck confit. The complexity here is subtle, but profound.
Ian Hilton can be reached at [email protected]
Tags: Chicken Pot Pie, crust, veggies, hardy pie, butter, flaky, golden