


Pan pizza perfection
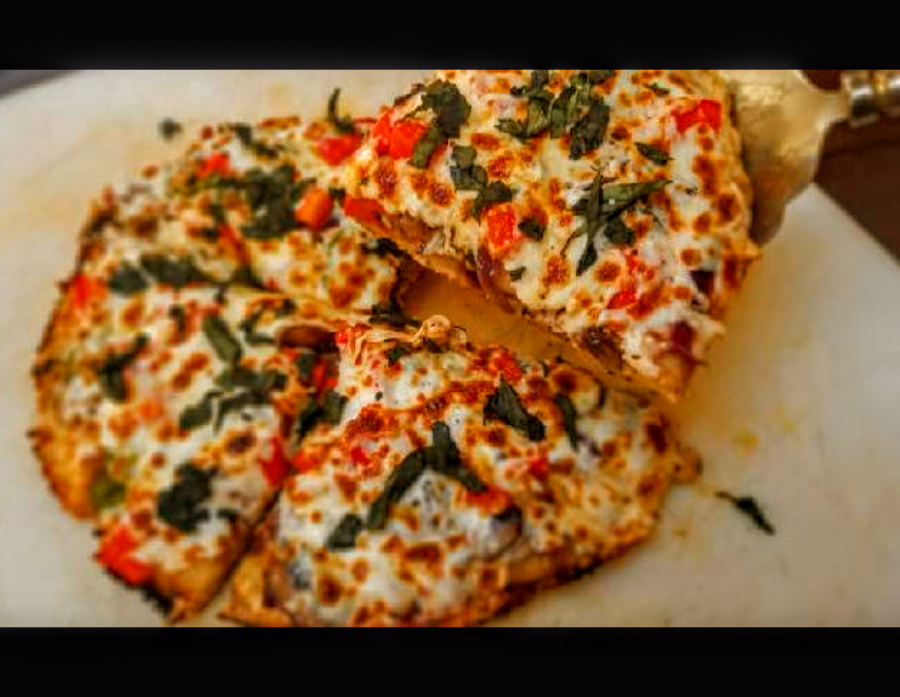
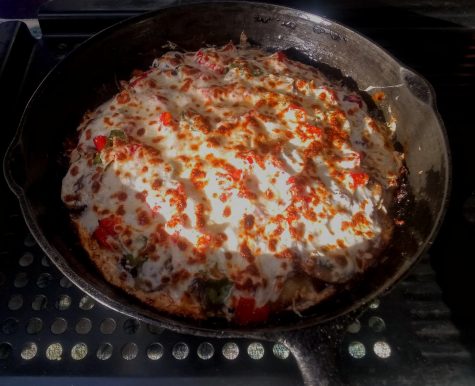
Shredded pork shoulder, mushroom, red onion and basil pan pizza.
I flipping love pizza. When I don’t feel like cooking, ordering from Celestino’s or grabbing a take-and-bake from Papa Murphy’s suffices just fine. I also love take-and-bake because a cheese pizza becomes so much more when I add ingredients from home before I cook it.
Nonetheless, nothing beats homemade pizza. I have a pizza stone, and that’s great for a thin crust, but sometimes I feel left wanting.
Well, I figured it out. Pan pizza checks all the boxes for me, and I learned a technique that allows for a thicker, but not deep dish, pie with a crispy crust and minimal equipment.
Regarding dough, I don’t recommend the pre-made stuff. It’s fine in a pinch, but your best bet is making it yourself. Thankfully, it’s easier than I thought and will keep for a week in a refrigerator and about a month in a freezer.
I useRed Star brand active dry yeast. Red Star’s website has pizza dough instructions; I recommend both following those instructions for portioning and searching internet videos to observe technique (mixing, kneading, etc.). Everyone and their mom seem to have “the best way” to make dough, but Red Star’s instructions and technique videos are all you should need.
Once your dough is made, I recommend portioning it appropriately and refrigerating it for a few days to a week to allow the yeast to fully ferment. Beyond that, get or make some sauce, chop your veggies, cook your meats (never put raw meat on a pizza), and grate your cheese.
Let’s cook.
Prep time: ?
Prep time really depends on how much and what you’re putting on your pizza. Dough-ready, a cheese pizza’s prep time should be as long as it takes you to grate cheese. I sautéed onions and mushrooms for mine but left my chopped bell pepper raw because I like the texture. I also used leftover pork shoulder, so my meat prep only required shredding it by hand.
Cook time: 22-25 minutes.
Total time: Again, it depends, but considering the dough-making we’re looking at 1-2 days. Yes, it’s labor-intensive but so incredibly worth it if you can afford to plan ahead.
Equipment:
Oven-safe pan. I’m a cast iron fan, but as long as your pan doesn’t have plastic handles or straight sides, it’ll work. I wouldn’t worry if your pan is non-stick; although heating Teflon can release toxins, we won’t be cooking the pizza for long enough for that to happen. It’s not my preference, but it should be safe.
Oven and range.
Kitchen knife.
Cutting board.
Rubber spatula.
Cheese grater.
Cooling rack.
Ingredients:
2 tablespoons of olive oil, separated.
1 pinch each of dried oregano and red pepper flake
1 dash of salt
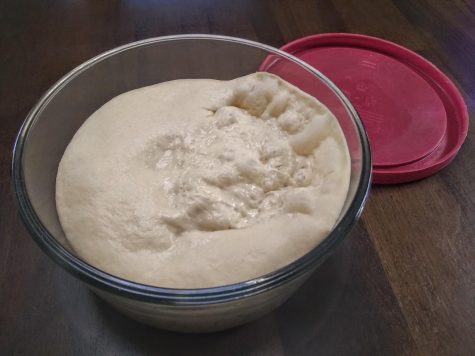
About three cups worth of dough (see picture).
½-1 cup of sauce (see note).
1 cup of grated Mozzarella cheese (see note).
½ cup of grated Parmesan cheese.
Veggies (see note).
Meat (see note).
Topping herbs (I like fresh, ribboned basil).
Procedure:
Take the dough out of the refrigerator and let it set at room temperature for 1-2 hours.
Prep all vegetables and meat(s).
Move the oven rack to its top position and preheat the oven to high broil. If your oven doesn’t have a broil setting, preheat it to its highest temperature (usually 500 F).
Pour one tablespoon of oil into the oven-safe pan, about 1 U.S. quarter to half-dollar size.
Sprinkle the oregano, red pepper flake and salt into the oil.
With your fingers, spread the oil mixture across the bottom of the pan and up the sides about half-way.
Place the dough into the pan, and with your fingers, spread it out evenly to the edge of your oil mark up the pan’s sides. This takes some time, as the dough will want to shrink back down. Just keep coaxing it gently, it’ll take shape.
Rub the remaining tablespoon of oil on the top of the dough; this will keep it from drying out while it’s cooking.
Put the pan on the range and turn the heat to medium. We’re “frying” the dough technically, and with your trusty rubber spatula, lift up the sides periodically to check the bottom. Ideally, you’ll want the bottom to look like what you want the bottom of your finished pizza to look like when you take the pan off the heat (don’t just turn the heat off, remove the pan from the heat entirely).
Spread the sauce across the dough, leaving about an inch around the rim of the dough sauceless. This rim of un-sauced dough will puff up more than the rest that’s weighted down by sauce.
Add a handful of Mozzarella and spread evenly from edge to edge.
Add meat(s) if using.
Add vegetables if using.
Add the Parmesan cheese, spreading edge to edge.
Add the remaining Mozzarella, again edge to edge. Unless you don’t like crispy edge cheese. But you do. We all know you do.
Place the pan on the top rack of the oven for 5-6 minutes.
Remove the pan and put it in the oven’s broiler for 2 minutes.
Remove the pan entirely, spread preferred herbs on top, and let it set for about 5 minutes.
Remove the pizza from the pan onto a cooling rack and let it set for about 5-10 minutes.
Notes:
Saucy pants: I like a medium amount of sauce, some people like their pizza swimming in it. It’s up to you, just know that a little goes a long way. I got some organic pizza sauce from the Chico Natural Foods Co-op for $1.99 because I felt lazy after making my own dough, but making sauce is quite easy. It’s just a can of tomatoes, salt, garlic powder, tomato paste and a touch of sugar.
Cheese, please: The best Mozzarella is a low-moisture whole milk product. Can’t find low-moisture like me? Use a paper towel to dry off excess moisture, you should be fine. My pizza was. Further, put it in a freezer for about half an hour before grating it, otherwise it’ll be a pasty mess.
Veggielicious: Again, we’re dealing with personal preference here. I’d never put raw mushrooms on a pizza, and I do like raw onion, but decided to sauté both for my pizza. As I mentioned above, I wanted the crunch of raw bell pepper for added texture, so use your own discretion. Also, fruits like pineapple or raisins (yes, some people do that) shouldn’t be precooked.
Meat supreme: I already mentioned this, but it bears repeating — always cook meat before you top a pizza with it. That’s not to say that you can’t continue the process; pan-frying pepperoni or salami before topping provides additional crispness and allows you to sop up excess oil.
Ian Hilton can be reached at [email protected].