Breading better
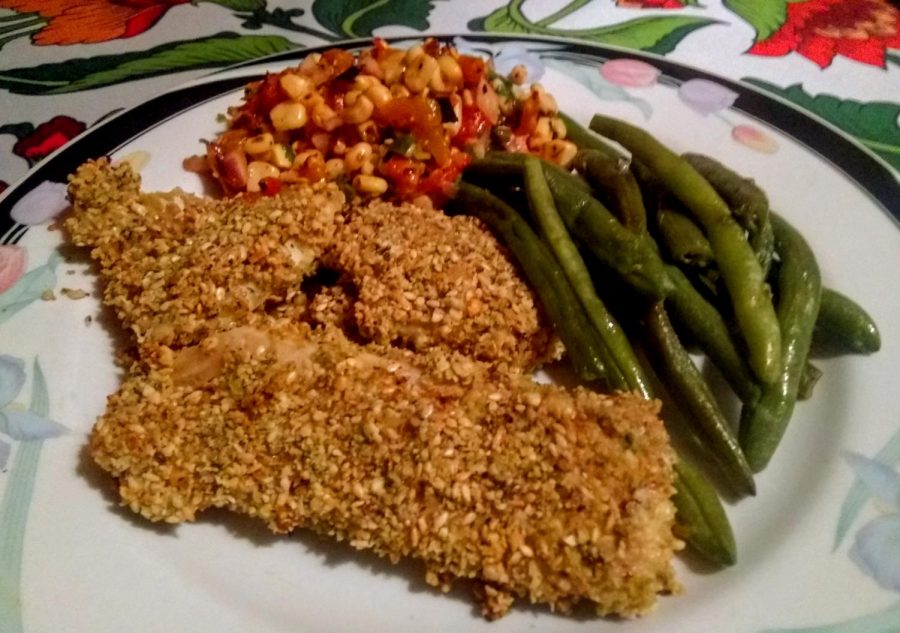
Photo by Ian Hilton, 8/31/2021.
Sesame, herb and parmesan breaded cod, corn salsa and steamed green beans.
Welcome back, Wildcats! Transitioning back to in-person classes has been a challenge, so let’s simplify a versatile kitchen technique – breading.
By “breading,” we’re talking about coating a protein, vegetable or fruit with breadcrumbs to be fried or baked. Most commonly found in grocery stores are standard breadcrumbs and panko, a type of breadcrumbs. While the standard product is simply bread that’s been staled and ground, panko is bread that’s been cooked with electricity, a process I wouldn’t recommend at home.
Since cooking bread with an electric charge cooks it from the inside out, panko lacks a crust. This allows the inside to get as cooked as the outside, resulting in a crispier coating than standard breadcrumbs. Plan your breaded recipe accordingly.
The next choice is how to get the crumbs to stick to your food. There are a few schools of thought, but the right technique depends on what you’re cooking and how coated you want your crumbs.
Although not my preferred method, using water to bind crumbs to food works when cooking a piece of dense protein such as pork chop or chicken breast. This is because the protein fibers don’t allow for much water penetration, unlike fish or zucchini.
Some cooks like separating an egg and using the yolk as a binder, but this usually means using more than one egg.
I lean toward using an entire egg with about a teaspoon of water whisked in. Counterintuitively, the binder can’t be too sticky because it will stick to itself and not the food. A tiny splash of water helps break up the egg proteins to allow for a more even coating.
Next, the breadcrumbs themselves. Alone, breadcrumbs are boring. Be bold with your breading! If you’re cooking an Italian meal, consider adding oregano, thyme and parmesan, as finely graded as possible. If you’re cooking an Asian dish, play around with sesame seeds, garlic powder or MSG. Regardless, it’s tough to argue with salt and pepper at the very least.
You’ve got your binder and your breading, now what? The technique that works best for me is the wet hand/dry hand method. Let’s say we’re planning on breading and frying strips of chicken breast. The chicken is cut up on one surface, our binder is in a bowl, the breadcrumbs are on a plate and an empty staging plate is standing by to hold our coated chicken.
Place these items in that order to allow for an assembly line-style setup.
Unless you’re only breading a couple of pieces, I recommend staggering the amount of breadcrumbs on the plate. The egg is going to drip down into the remainder of the crumbs, making each subsequent coating more wet and therefore less even. The object is an even coating that’s as dry as possible. Adding fresh crumbs as you go alleviates this annoyance.
I’m right-handed, so I use my right hand as my “wet” hand and my left as my “dry.” With my right hand, I place one or two pieces of chicken in the egg, turning and coating it. With my left hand, I grab a small handful of breadcrumbs, leaving a good amount on the bottom of the plate.
After letting the excess egg drip from the chicken, I place it on the breadcrumb plate with my right hand. I drop what’s in my left hand on top of it, then pat and roll the chicken until all sides are coated, again with my left hand. It then goes on the staging plate, ready to fry.
This technique prevents breadcrumbs from infiltrating the egg or excess egg from wetting down the breadcrumbs. If you’re breading more than a few pieces, expect to rinse off your hands as they’ll unavoidably get coated.
From there your food is ready for the fryer or oven. The oven is, of course, a healthier method to cook, but let’s be real: fried food is phenomenal.
Don’t hesitate to explore breading options! We discussed chicken, pork, fish and zucchini, but this world of enhancing your dish is wide. Cauliflower, shrimp, broccoli and tofu are all amazing when breaded. Keep in mind: the more water a food product has, such as tomatoes or fish, the more delicately they’ll have to be handled in all steps.
Happy breading and best of luck this semester!


